rdsp转m3u8
1.准备步骤
1.1 安装所需要环境
- nginx-1.7.11.3-Gryphon 因为这个包含了rtmp模块如果要用到rtmp模块的话可以安装这个版本 不需要的话直接官网下载也行
- ffmpeg下载地址 https://github.com/BtbN/FFmpeg-Builds/releases
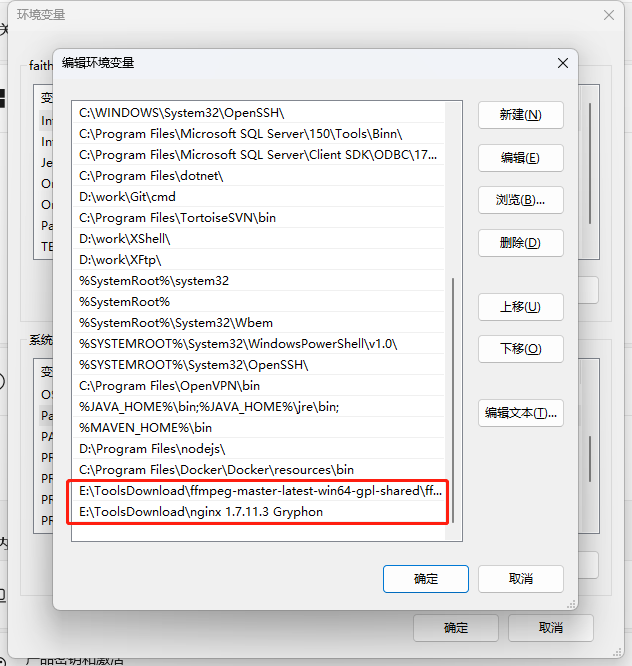
1.2 将nginx和ffmpeg加入环境变量当中
1.3 增加 nginx conf配置
1.3.1 因为需要通过nginx转发m3u8地址需要配置nginx的conf文件和之后拉流要指定文件夹
1 | server { |
1.3.2 打开nginx中的html文件夹,创建hls文件夹
这一步是为了到时候远程的rtsp路劲拉流到本地文件夹(就是这个hls文件夹)当中
1.3.3 cd到nginx根目录执行命令运行nginx 可以打开localhost:80测试nginx是否正常运行
1 | nginx -c conf/nginx-win.conf |
1.4 接着就是使用ffmpeg工具将远程的rdsp地址将视频切割成m3u8的格式
1 | ffmpeg -rtsp_transport tcp -i rtsp地址 -fflags flush_packets -max_delay 1 -an -flags -global_header -hls_time 1 -hls_list_size 3 -vcodec copy -s 216x384 -b 1024k -y 本地存储hls的文件夹 |
7.nginx的作用就是将请求转发到这些m3u8
题外话一般入门不懂没有线上的rtsp地址的时候如何生成一个rtsp地址
- 下载地址: https://github.com/aler9/rtsp-simple-server/releases
运行rtsp-simple-server.exe 默认监听端口8554 - 通过ffmpeg工具将本地视频推流到 rtsp服务地址
1
ffmpeg -re -stream_loop -1 -i 你视频的文件名 -c copy -f rtsp rtsp://127.0.0.1:8554/video
- 使用vlc player 就能够通过流地址rtsp://127.0.0.1:8554/video 打开了
- Title: rdsp转m3u8
- Author: faith team
- Created at: 2023-08-02 14:13:05
- Updated at: 2026-03-02 00:50:34
- Link: https://redefine.ohevan.com/2023/08/02/20230913rdsp转m3u8/
- License: This work is licensed under CC BY-NC-SA 4.0.
Comments